
One of my first bottle cap pins with the title of my mystery novel.
Bottle cap jewelry is a blast to make. I discovered quite by accident, while researching what to do at my craft sessions at the Bouchercon conference this year. What could up to 30 people make in less than an hour? Answer: see above. Then I realized that bottle cap pieces could be wonderful as gifts for all sorts of occasions. Each unique. A baby shower? Give a bottle cap pin with the photo of the new mom as a baby! Maybe pins for all the attendees! How about making a bunch of Christmas bottle cap ornaments? Give out a bottle cap magnet for a Halloween treat! A project for your child's class? The limit is your imagination.
This post is a quick and dirty primer to making these.
First, the materials: I would suggest going to either Beadaholique or Amazon for these supplies:
50 Mixed Color Bottle Caps Craft Scrapbook Jewelry
1" Circle Epoxy Stickers For Bottle Cap Pendants
EK Success Papers Shapers Nesting Punch 1" (or any other brand, as long as 1")
Glue Dots Super Strength Multi-Use 1/2" dots
Images:
use photos, images from magazines and greeting cards, draw your own, stencil, use stamps, stickers, glue small objects that fit within the one inch circle, there are inexpensive bottle cap images for sale, or a combo of, well, whatever you want!
Yes, it is possible to do bottle caps the old fashioned way, cut out the image with a pair of scissors, recycle used bottle caps if not bent, glue and then use clear varnish on the top, but most of these supplies are inexpensive and if you're like me you'll keep coming up with new ideas for these things. And it makes it much faster and easier.
How to:
Take your 1" paper circle image and press it against a Glue Dot. Press the circle into the bottle cap. Holding by the edges, place a 1" Circle Epoxy Sticker on top. DONE Now you need to attach whatever to the back, whether it be a pin back, or hanger for pendants, or magnet. DONE.
Here's how I made a demi-parure of a pin and earrings using part of the cover image from The Mall Fairies: Exile (artist Kaytalin Platt, great cover art, so pretty!):


And dear readers, do you have any craft projects like this? Would love to know!
50 Mixed Color Bottle Caps Craft Scrapbook Jewelry
1" Circle Epoxy Stickers For Bottle Cap Pendants
EK Success Papers Shapers Nesting Punch 1" (or any other brand, as long as 1")
Glue Dots Super Strength Multi-Use 1/2" dots
Images:
use photos, images from magazines and greeting cards, draw your own, stencil, use stamps, stickers, glue small objects that fit within the one inch circle, there are inexpensive bottle cap images for sale, or a combo of, well, whatever you want!
Yes, it is possible to do bottle caps the old fashioned way, cut out the image with a pair of scissors, recycle used bottle caps if not bent, glue and then use clear varnish on the top, but most of these supplies are inexpensive and if you're like me you'll keep coming up with new ideas for these things. And it makes it much faster and easier.
How to:
Take your 1" paper circle image and press it against a Glue Dot. Press the circle into the bottle cap. Holding by the edges, place a 1" Circle Epoxy Sticker on top. DONE Now you need to attach whatever to the back, whether it be a pin back, or hanger for pendants, or magnet. DONE.
Here's how I made a demi-parure of a pin and earrings using part of the cover image from The Mall Fairies: Exile (artist Kaytalin Platt, great cover art, so pretty!):

The arrows are for knowing how the images face because ...

...it's impossible to tell when they are face down!
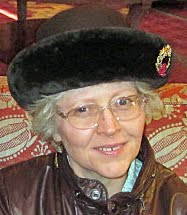
Then I glued the pin back and earring pieces on and here I am wearing the finished product:

So simple and easy! Doing these at the craft sessions is going to be a blast!
And dear readers, do you have any craft projects like this? Would love to know!